A common requirement for many applications is to offer users the ability to download grid data in various formats. This blog will guide you through customizing download functionalities for an Interactive Grid, including how to open the download dialog and how to automate direct CSV downloads.
Step 1: Set Up Your Interactive Grid
Before implementing custom download features, ensure you have a properly configured Interactive Grid:
- Create a new page in Oracle APEX and select “Interactive Grid” as the page type.
- Configure the grid to use the
EMPtable or your chosen data source. - Assign a static ID to the Interactive Grid region, for example,
emp_region_id.
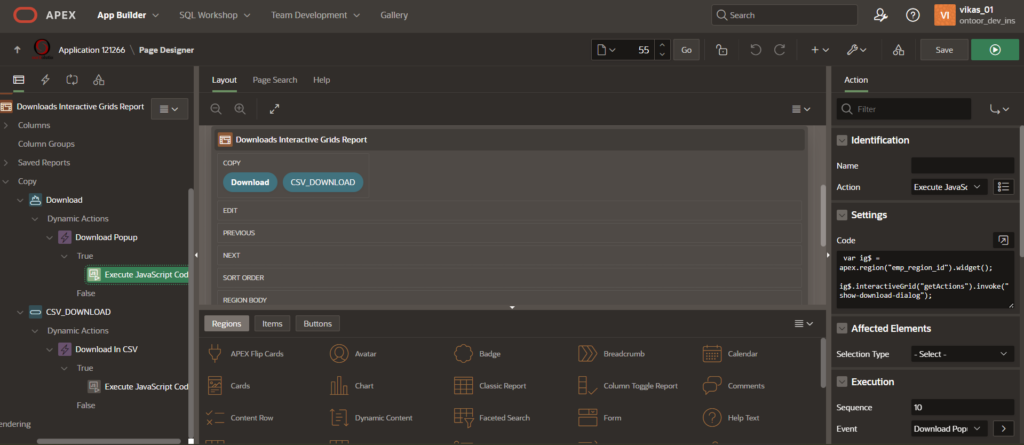
Step 2: Open the Download Dialog
To enable users to choose the file format for downloading data, you need to open the download dialog programmatically. This approach allows users to select from various formats like CSV, Excel, or PDF.
Code to Open Download Dialog:
var ig$ = apex.region("emp_region_id").widget();
ig$.interactiveGrid("getActions").invoke("show-download-dialog");
How It Works:
apex.region("emp_region_id").widget(): Retrieves the Interactive Grid widget instance associated with the static IDemp_region_id.ig$.interactiveGrid("getActions").invoke("show-download-dialog"): Calls theshow-download-dialogaction to open the dialog where users can choose their preferred file format.
Implementation:
- Add this JavaScript code to a Dynamic Action triggered by an event such as a button click or page load to display the download dialog to users.
Step 3: Directly Download Data in CSV Format
For a more automated approach where the data is downloaded directly in CSV format without user intervention, use the following code. This script simulates a click on the “Download” button within the dialog.
Code for Direct CSV Download:
var ig$ = apex.region("emp_region_id").widget();
ig$.interactiveGrid("getActions").invoke("show-download-dialog");

$("div[aria-labelledby='ui-id-1']").find("button").each(function(){
  if ($(this).html() == "Download") {
    $(this).trigger("click");
  }
});

// OR


 var ig$ = apex.region("emp_region_id").widget();
 ig$.interactiveGrid("getActions").invoke("show-download-dialog");
 $("div[aria-describedby='emp_region_id_ig_download_dialog']").find("button").each(function(){
   if ($(this).html() == "Download")
   {
     $(this).trigger("click");
   }
 });
How It Works:
apex.region("emp_region_id").widget(): Retrieves the Interactive Grid widget instance for the region with static IDemp_region_id.ig$.interactiveGrid("getActions").invoke("show-download-dialog"): Opens the download dialog.$("div[aria-labelledby='ui-id-1']"): Targets the dialog element using thearia-labelledbyattribute. Adjust this selector if necessary based on your specific dialog..find("button"): Finds button elements within the dialog..each(function() { ... }): Iterates through each button.if ($(this).html() == "Download"): Checks if the button text matches “Download.”$(this).trigger("click"): Simulates a click event on the button, initiating the download.
Implementation:
- This code is ideal for scenarios where you want to automate the download process, such as triggering a download upon page load or as part of a scheduled action.
Conclusion
Customizing data download functionalities in Oracle APEX Interactive Grids can enhance the user experience by providing flexible and automated data export options. By following the methods outlined—opening the download dialog for user-driven format selection or directly triggering a CSV download—you can tailor the grid’s capabilities to better meet your application’s needs.
Incorporate these techniques into your APEX applications to streamline data management and improve efficiency. Happy coding!