3 ways to Add Custom Button In Interactive Grid Oracle APEX?
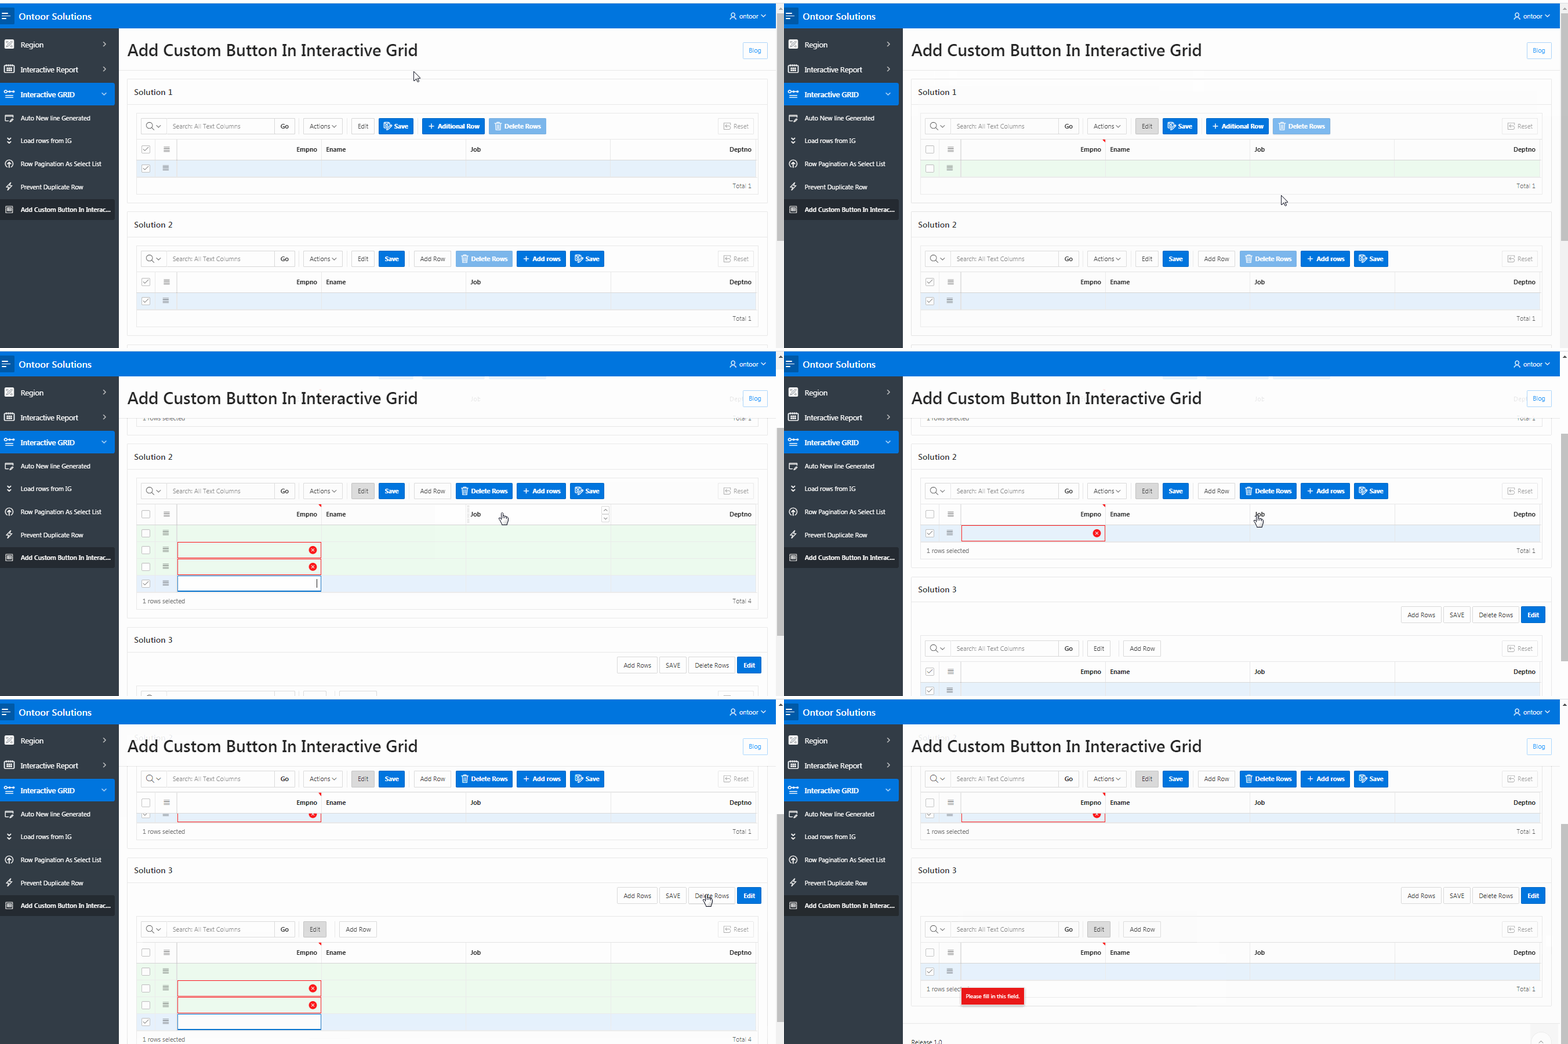
Now there are 3 ways to create custom Add, Edit, Save, and Delete buttons for an Interactive Grid in Oracle APEX and all these buttons will execute the JavaScript code to perform Add, Edit, Save, and Delete row functions.
But the question is that why we should create custom buttons when we have the default buttons enabled for an Interactive Grid in Oracle APEX? We never know what kind of a requirement can come from the client for customization and then we have to create custom button to take more control over it, To create this custom button follow these below steps:
Solution: 1
- Create interactive grid using following query and set Static ID “ontoor” to the Interactive Grid Region:
select ROWID,
       EMPNO,
       ENAME,
       JOB,
        DEPTNO
  from EMP
 where 1=2
- Copy and paste following jQuery to region attributes in JavaScript Initialization Code:
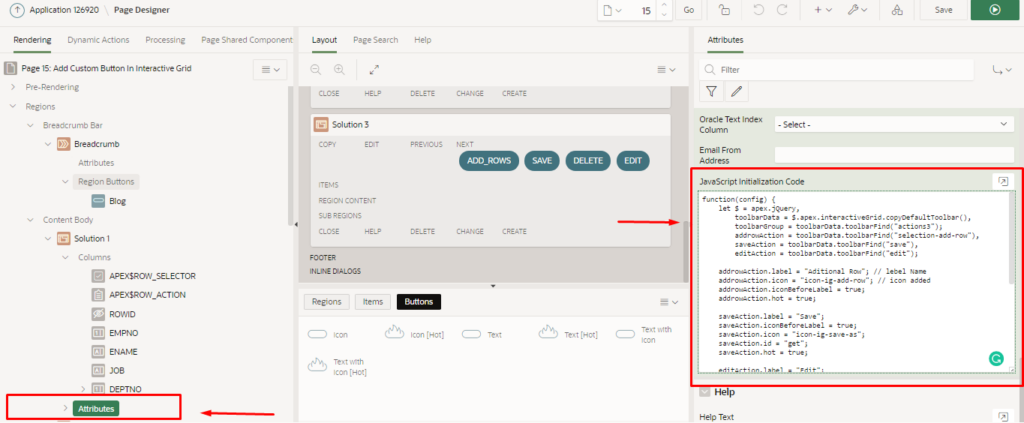
function(config) {
    let $ = apex.jQuery,
        toolbarData = $.apex.interactiveGrid.copyDefaultToolbar(),
        toolbarGroup = toolbarData.toolbarFind("actions3");
        addrowAction = toolbarData.toolbarFind("selection-add-row"),
        saveAction = toolbarData.toolbarFind("save"),
        editAction = toolbarData.toolbarFind("edit");

    addrowAction.label = "Aditional Row"; // lebel Name
    addrowAction.icon = "icon-ig-add-row"; // icon added
    addrowAction.iconBeforeLabel = true;
    addrowAction.hot = true;

    saveAction.label = "Save";
    saveAction.iconBeforeLabel = true;
    saveAction.icon = "icon-ig-save-as";
    saveAction.id = "get"; // button id
    saveAction.hot = true;

    editAction.label = "Edit";
    editAction.iconBeforeLabel = true;
    //editAction.icon ="icon-ig-edit-as";
    editAction.id = "edit";
    editAction.hot = true;

 toolbarGroup.controls.push({
 	type: "BUTTON",
    action: "selection-delete",
    icon: "icon-ig-delete",      // alternative FontAwesome icon: "fa fa-trash",
    iconBeforeLabel: true,
    hot: true
});


    config.toolbarData = toolbarData;
    return config;
}
Solution: 2
- Use above sql query for second solution.
- Copy and paste following query to region attributes in JavaScript Initialization Code:
function(config) {
    let $ = apex.jQuery,
    toolbarData = $.apex.interactiveGrid.copyDefaultToolbar(),     // copy the whole toolbar
    // this is the group with the action=add row
    toolbarGroup = toolbarData.toolbarFind("actions3");

toolbarGroup.controls.push({
                type: "BUTTON",
                action: "selection-delete",
                icon: "icon-ig-delete",     // alternative FontAwesome icon: "fa fa-trash",
                iconBeforeLabel: true,
                hot: true
                 });

toolbarGroup.controls.push({
						type: "BUTTON",
						action: "selection-add-row",
						label :"Add rows",
						icon: "icon-ig-add-row",  // FontAwesome icon: "icon-ig-add-row",
						iconBeforeLabel: true,
						hot: true
                               });

 toolbarGroup.controls.push({
						type: "BUTTON",
						action: "save",
						label :"Save",
						icon: "icon-ig-save-as",  //FontAwesome icon: "icon-ig-save-row",
						iconBeforeLabel: true,
						hot: true
						});

    config.toolbarData = toolbarData;
    return config;
}
Solution: 3
- Set Region Static ID,Template and Attributes for the Interactive Grid Region:
* Advanced > Static ID: ontoor* Appearance > Template: Standard * Edit Enabled: Yes (Region Attributes)
- Create four button using name: ADD_ROWS, SAVE, DELETE, EDIT and set button position to next.
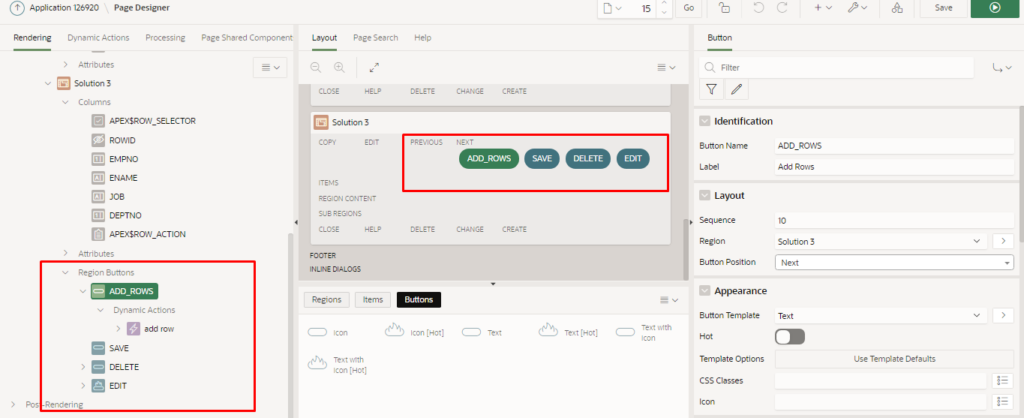
- Create dynamic action on click ADD_ROWS button and execute following script.
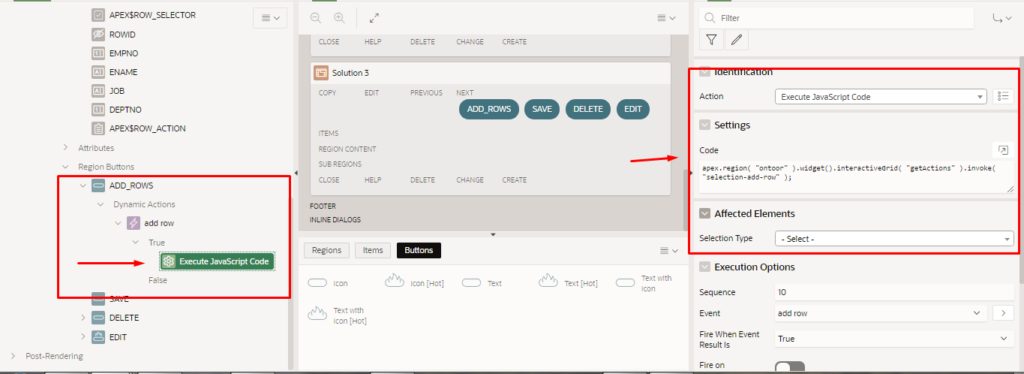
apex.region( "ontoor" ).widget().interactiveGrid( "getActions" ).invoke( "selection-add-row" );
- Create dynamic action on click SAVE button and execute following script.
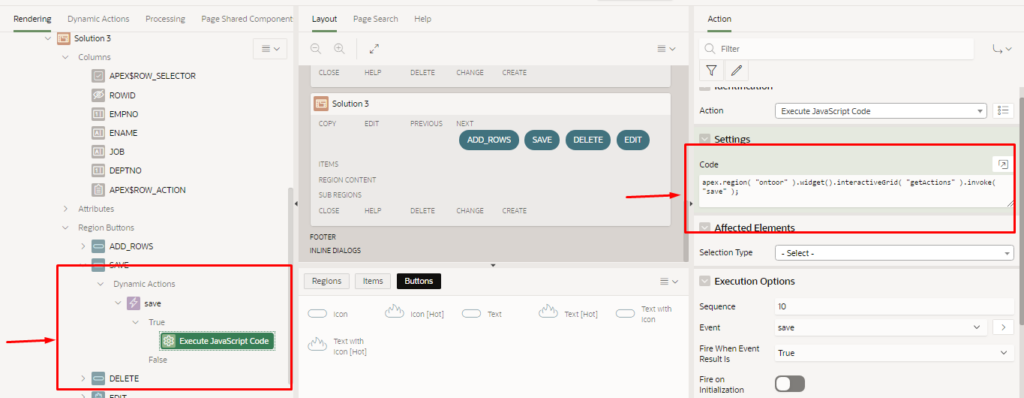
apex.region( "ontoor" ).widget().interactiveGrid( "getActions" ).invoke( "save" );
- Create dynamic action on click DELETE button and execute following script.
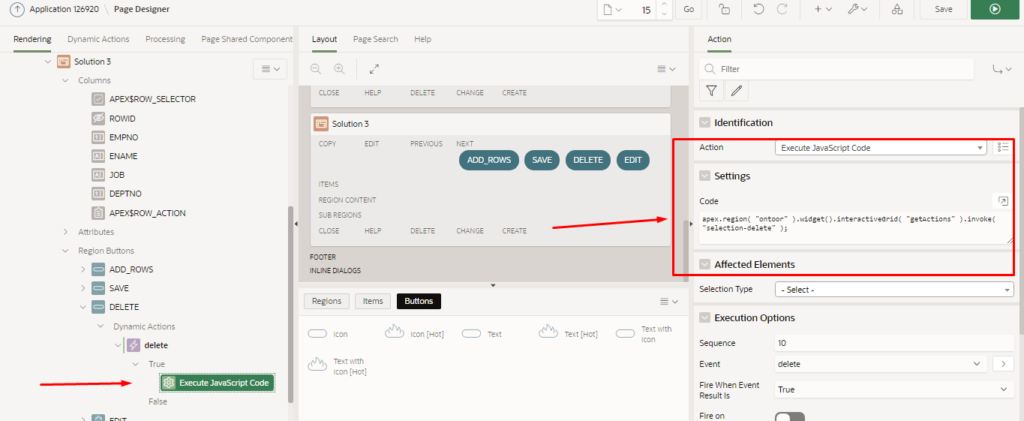
apex.region( "ontoor" ).widget().interactiveGrid( "getActions" ).invoke( "selection-delete" );
- Create dynamic action on click EDIT button and execute following script.
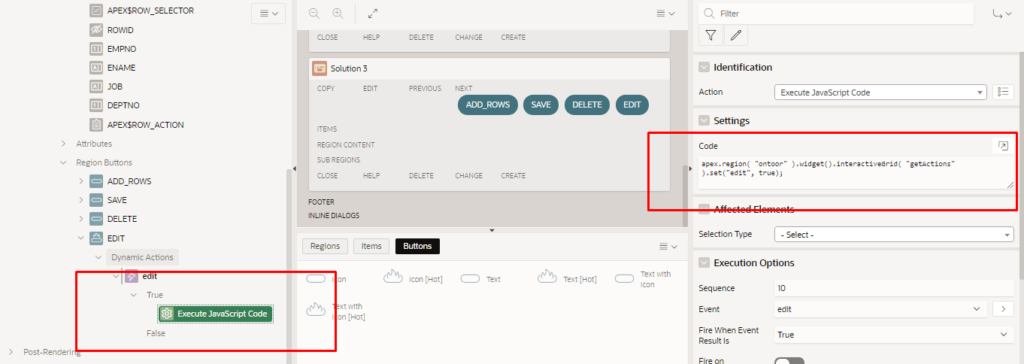
apex.region( "ontoor" ).widget().interactiveGrid( "getActions" ).set("edit", true);