Oracle APEX Interactive Grids offer a flexible way to manage and display data. A common customization is adding a “Rows Per Page” selector to the toolbar, allowing users to adjust the number of rows displayed. This customization requires that the pagination type be set to “Page.” This article explains how to add this functionality using a JavaScript-based approach and provides insights into ensuring proper pagination settings.
The Importance of a “Rows Per Page” Selector
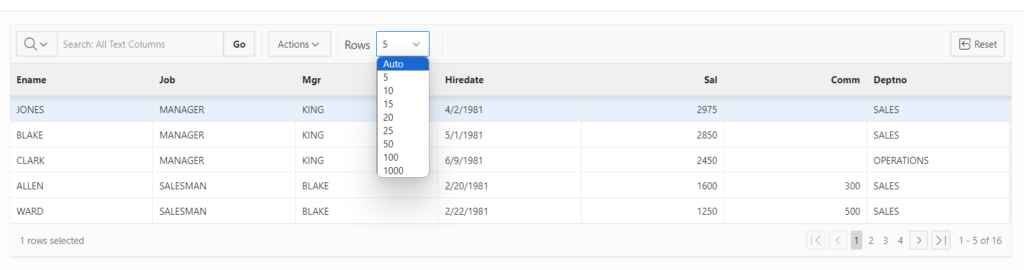
A “Rows Per Page” selector enhances the user experience by giving users control over the number of rows displayed in an Interactive Grid. This flexibility is useful for:
- User Preference: Allows users to choose the optimal number of rows for their workflow.
- Performance: Displaying fewer rows can improve grid responsiveness.
- Enhanced Usability: Provides a way to adjust the grid’s view to the user’s preference.
Pagination Requirement: Set to “Page”
For the “Rows Per Page” selector to function properly, the pagination type must be set to “Page.” Other pagination types may not support dynamic row changes or may cause unexpected behavior.
JavaScript Code to Customize the Toolbar
The following JavaScript function customizes the Interactive Grid toolbar to add a “Rows Per Page” selector, along with an optional static “Rows” label. This code snippet is designed for Oracle APEX Interactive Grids with pagination set to “Page.”
function(config) {
    var $ = apex.jQuery; // Oracle APEX's jQuery instance
    var toolbarData = $.apex.interactiveGrid.copyDefaultToolbar(); // Copy the default toolbar
    var toolbarGroup = toolbarData.toolbarFind("actions2"); // Find the 'actions2' toolbar group

    // Add the "Rows Per Page" selector
    toolbarGroup.controls.unshift({
        type: "SELECT",
        action: "change-rows-per-page" // Action to change rows per page
    });

    // Optional: Add a static "Rows" label for additional context
    toolbarGroup.controls.unshift({
        type: "STATIC",
        label: "Rows"
    });

    config.toolbarData = toolbarData; // Update the toolbar configuration
    return config; // Return the modified configuration
}
Applying the Customization to the Interactive Grid
To use this JavaScript code in Oracle APEX, follow these steps:
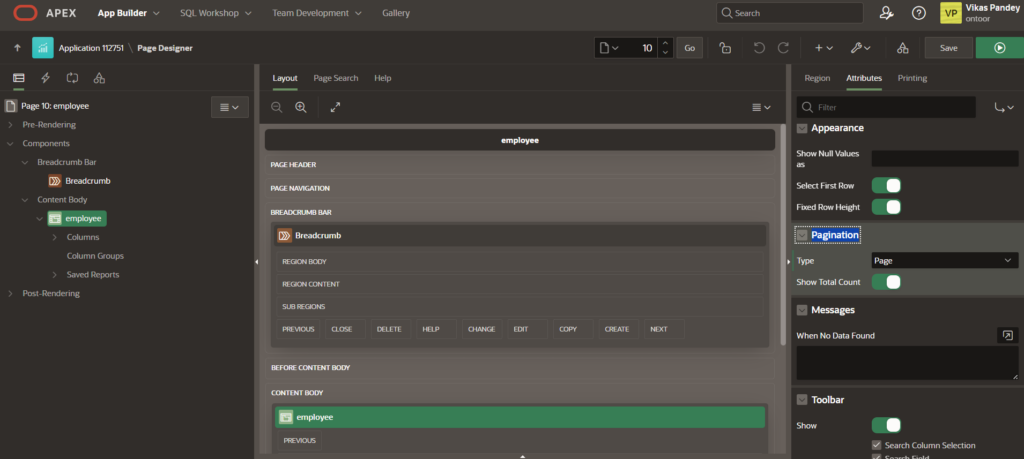
- Set Pagination Type to “Page”:
- Open Oracle APEX and navigate to the Interactive Grid’s page.
- In the “Attributes” tab, ensure “Pagination Type” is set to “Page.”
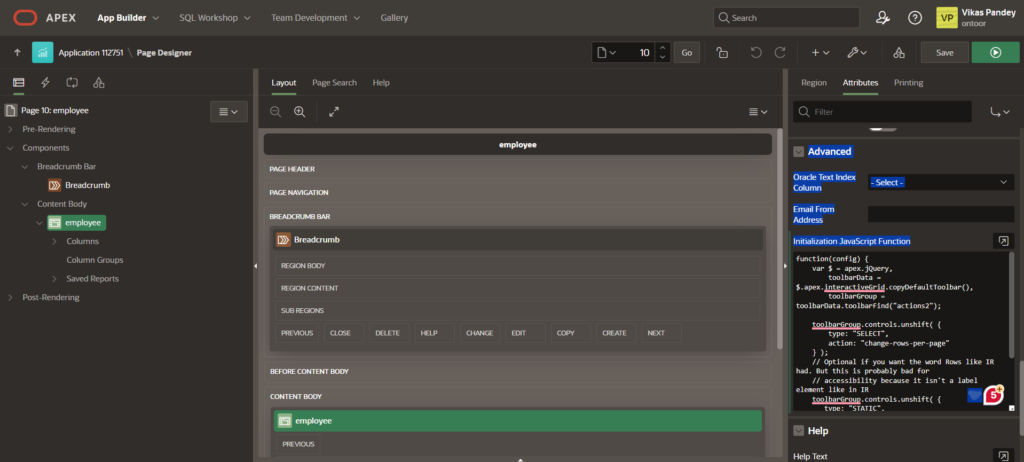
- Add the Initialization Code:
- In the “Advanced” section, find “Initialization Code.”
- Paste the JavaScript code snippet to customize the toolbar.
- Test the Customization:
- Run the page to ensure the “Rows Per Page” selector and optional static “Rows” label are visible in the toolbar.
- Test the selector to ensure it changes the number of rows displayed in the grid as expected.
Troubleshooting Tips
If the customization doesn’t work, consider these common issues:
- Ensure Correct Pagination: The pagination type must be set to “Page” for this customization to work.
- Check JavaScript Errors: Open the browser’s developer tools to look for console errors.
- Verify Toolbar Group: Make sure you’re modifying the correct toolbar group (“actions2”).
Conclusion
Adding a “Rows Per Page” selector to the Oracle APEX Interactive Grid toolbar can significantly improve the user experience, offering greater flexibility in controlling row display. Ensure that your Interactive Grid’s pagination type is set to “Page” to implement this feature. By following the steps outlined in this article, you can successfully add this customization to your Oracle APEX Interactive Grid. If you encounter issues, refer to the troubleshooting tips to resolve common problems.