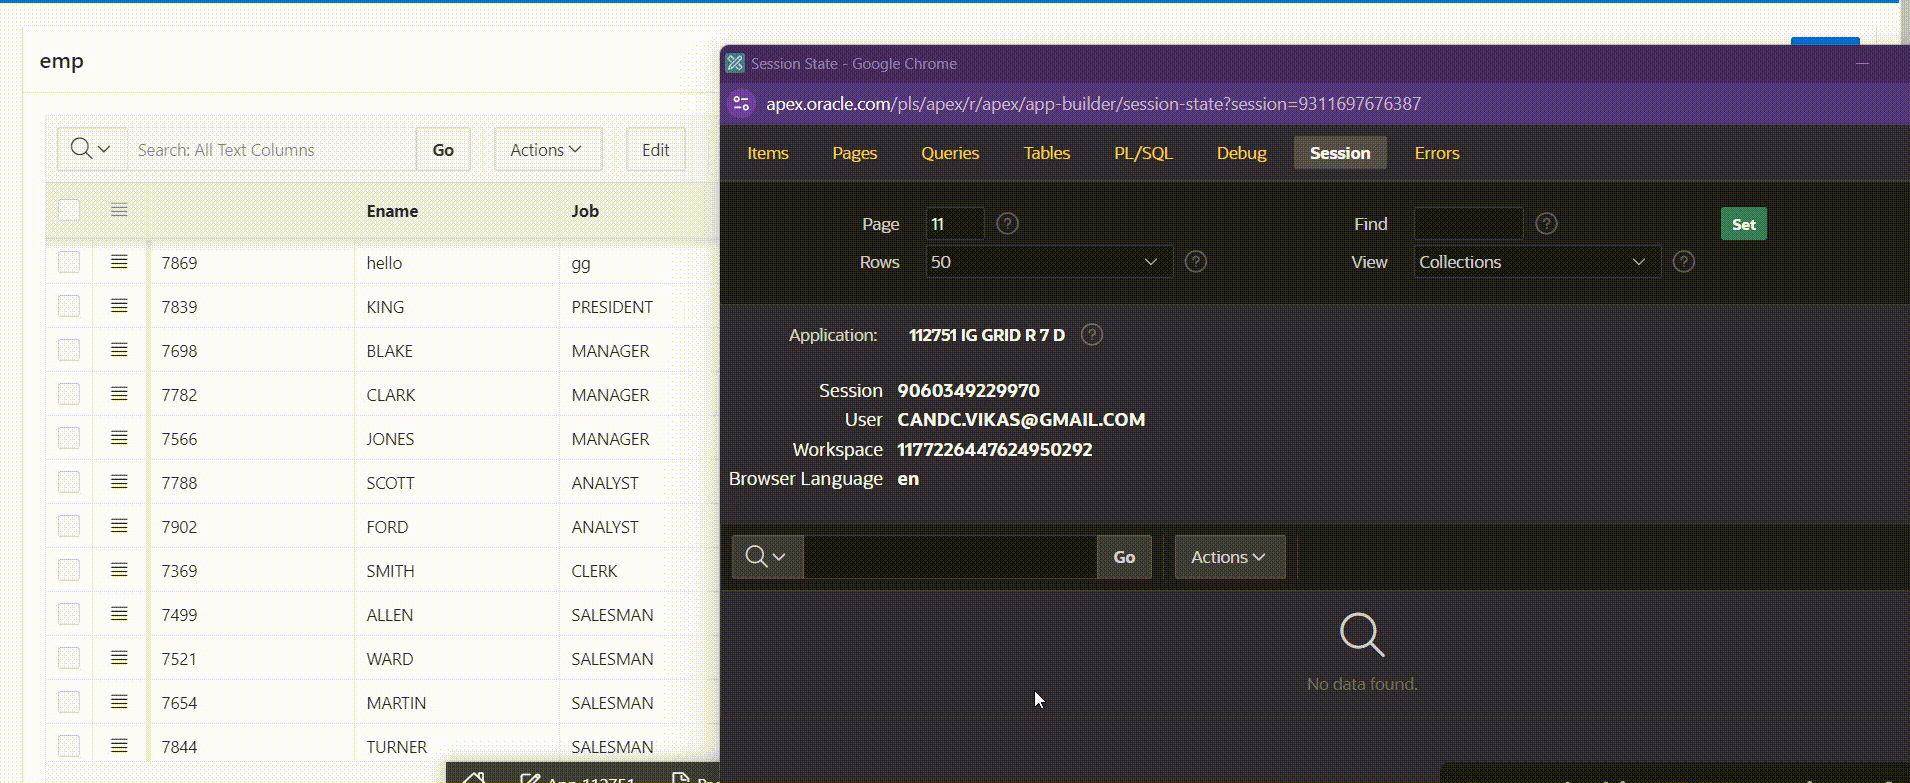
This blog will guide you through efficiently managing selected records from an Oracle APEX Interactive Grid. We’ll focus on capturing these selected records and inserting them into APEX collections. APEX collections are temporary storage structures used to manage and process data. By using this approach, you’ll streamline data handling and improve overall processing efficiency. This tutorial aims to enhance your ability to manage and manipulate grid data effectively within Oracle APEX
Create an Editable Interactive Grid
- Create a new page in Oracle APEX and select “Interactive Grid” as the page type.
- Configure the grid to use the
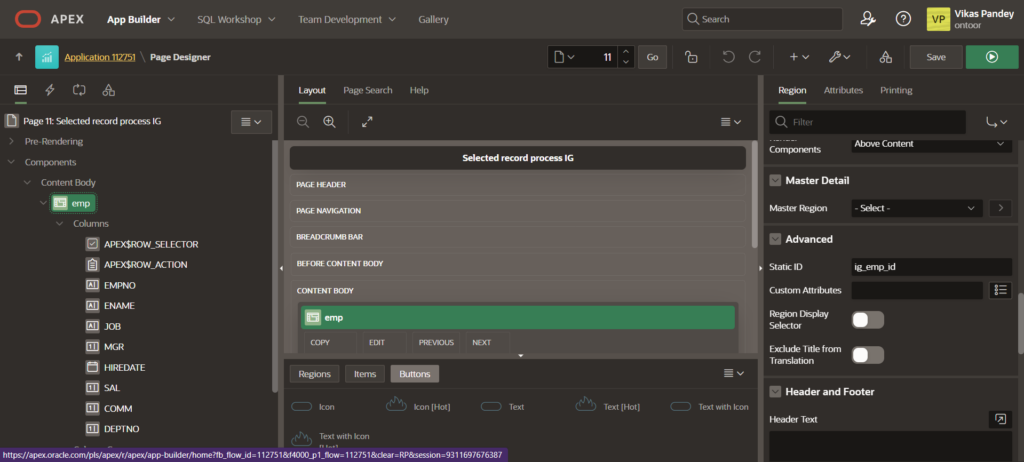
EMPtable or your chosen data source. - Assign a static ID to the Interactive Grid region, for example,
ig_emp_id. - Preview the page to verify that the Interactive Grid is editable.
Solution 1: Basic Primary Key Extraction
Extract selected records from an Oracle APEX Interactive Grid and insert them into an APEX collection. This process enables efficient data handling by temporarily storing the selected records. You’ll gain insight into capturing grid data and managing it through APEX collections for streamlined data processing. This approach enhances your ability to perform further operations on the selected data.
JavaScript Function for Managing Selected Records in Interactive Grid:
To manage selected records from the Interactive Grid and prepare them for server-side processing, use the following JavaScript function. This script gathers selected records, formats them into a JSON structure, and sends them to the server:
- Open the Page Designer:
- Navigate to the Page Designer for the page containing your Interactive Grid.
- Go to Function and Global Variable Declaration:
- Find the Function and Global Variable Declaration section on the Page tab.
- Add JavaScript Code:
- Insert the following JavaScript code:
- Usage:
- Call the
getSelectedRecords()function whenever you need to process or send the selected records to the server.
- Call the
const collectionName        = "EMP_LINES_COLL"
function getCheckLines()
{
  selRecords = {"rows": [] };
  gridView = apex.region("ig_emp_id").widget().interactiveGrid("getViews").grid;
  records = gridView.getSelectedRecords();
  if (records.length > 0) {
        $.each(records, function (i, r) {
            empId = gridView.model.getRecordId(r);
            selRecords.rows.push({"empid": empId});
            });
        selRecordsJSON = JSON.stringify(selRecords);
    }
}
 function getViewLines()
{
    getCheckLines();
    return  apex.server.process
    ("GET_LINES", {
        x01:records.length,
        x02:selRecordsJSON,
        x03:collectionName
    }, {
    dataType: 'JSON',
    success: function (data) {
    errorCode       = data.return_status,
    errorMessage    = data.return_message
    redirectUrl     = data.redirect_url;
        },
    });
}
Key Points:
getCheckLines()Function: Collects selected records from the Interactive Grid and formats them into a JSON object.getViewLines()Function: Sends the JSON data to the server, including the number of selected records, and handles the server’s response.gridStaticId: Set this to the static ID of your Interactive Grid (e.g.,"ig_emp_id").apex.region(gridStaticId).widget().interactiveGrid("getViews", "grid"): Accesses the Interactive Grid widget.gridView.getSelectedRecords(): Gets the selected records from the grid.$.each(records, function (i, record) { ... }): Iterates through the selected records.JSON.stringify(selectedRecords): Converts the selected records into a JSON string for easy handling on the server side.
This function efficiently handles the selected records from an Interactive Grid, converting them into a JSON format ready for server-side processing or further actions
Processing Selected Records from Interactive Grid with AJAX Call Back
To efficiently manage selected records from an Interactive Grid and insert them into an APEX collection, follow these steps:
DECLARE
    l_return_status   CHAR(1) := 'S';
    l_return_message  VARCHAR2(4000);
    l_values          apex_json.t_values;
    l_row_count       NUMBER;
    l_emp_id          number;  -- Adjust the size as needed based on your data
BEGIN
    -- Create or truncate the APEX collection
    apex_collection.create_or_truncate_collection(p_collection_name => apex_application.g_x03);

   IF apex_application.g_x01 > 0 THEN
        -- Parse the JSON data
        apex_json.parse(p_values => l_values, p_source => apex_application.g_x02);
        l_row_count := apex_json.get_count(p_path => 'rows', p_values => l_values);

        -- Loop through each row in the JSON data
        FOR i IN 1..l_row_count LOOP
            -- Get the Primary Key value from JSON data
            l_emp_id := apex_json.get_varchar2(p_path => 'rows[%d].empid', p0 => i, p_values => l_values);

            -- Add the record to the APEX collection
            apex_collection.add_member(
                p_collection_name => apex_application.g_x03,
                p_n001 => l_emp_id
            );
        END LOOP;
   END IF;

    -- Write response JSON
    apex_json.open_object;
    apex_json.write('return_status', l_return_status);
    apex_json.write('return_message', l_return_message);
    apex_json.close_object;
EXCEPTION
    WHEN OTHERS THEN
        apex_json.open_object;
        apex_json.write('return_status', 'E');
        apex_json.write('return_message', 'Error occurred: ' || SQLERRM);
        apex_json.close_object;
END;
Key Points:
- Collection Management: Creates or truncates an APEX collection to store selected records.
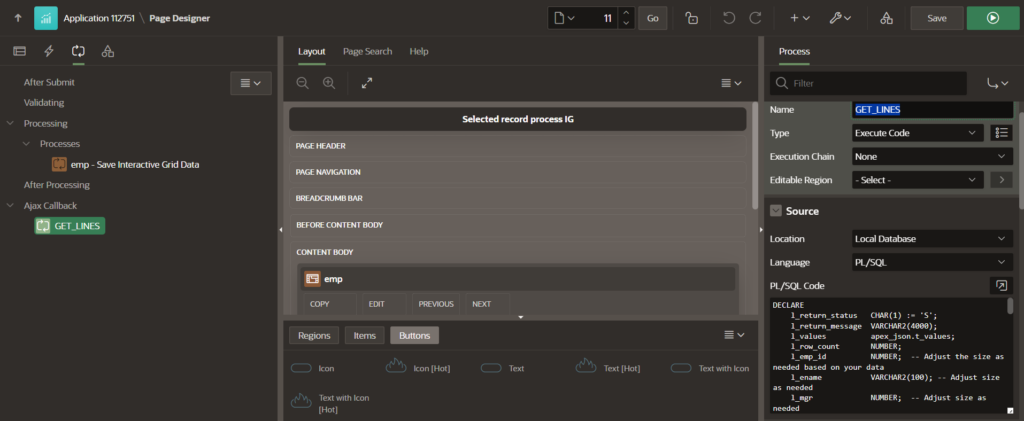
- GET_LINES: Creates Callback process with the name of GET_LINES.
- Data Parsing: Extracts primary key values from the JSON data and adds them to the collection.
- Error Handling: Provides meaningful error messages in case of issues.
- Button: Create a new button to execute this process and call the below function.
javascript:getViewLines();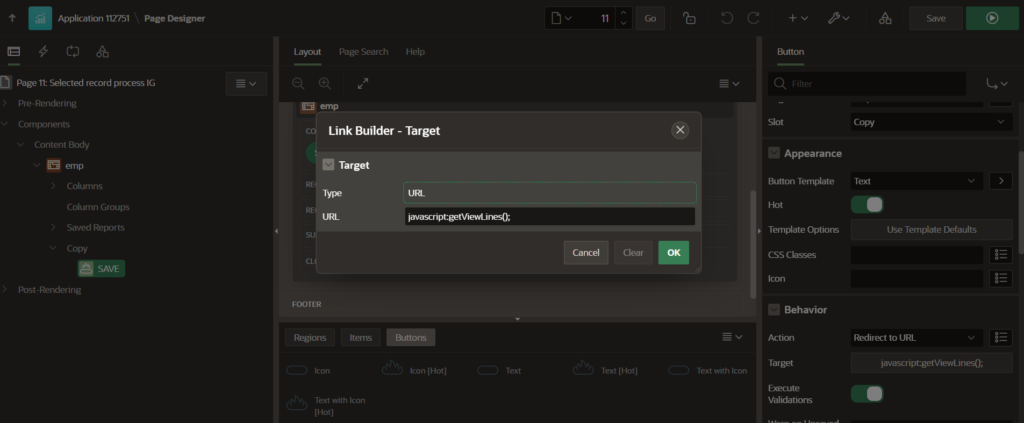
Applications and Benefits
Handling selected records from Interactive Grids and inserting them into collections can greatly enhance the functionality of Oracle APEX applications. Use cases include:
- Bulk Operations: Performing actions such as updates or deletions on selected records.
- Data Export: Preparing selected data for export or further processing.
- Conditional Logic: Applying business logic based on the selected subset of data.
Solution 2: Multi-Column Value Fetch
Objective: Fetch multiple columns of data from an Interactive Grid and process them in an APEX collection.
When your application requires processing of selected records from an Interactive Grid with multiple columns, it’s crucial to adopt a comprehensive approach. This ensures that all relevant data is captured, processed, and utilized effectively. Here’s a step-by-step guide to handling such scenarios:
Setting Up the Interactive Grid as above mentioned
- Create the Interactive Grid Page:
- Create a new page in Oracle APEX and select “Interactive Grid” as the page type.
- Configure the grid to use the
EMPtable or your chosen data source. - Assign a static ID to the Interactive Grid region, for example,
ig_emp_id.
Client-Side: Enhanced JavaScript for Multi-Column Fetch
In scenarios where you need to extract more than just the primary key from an Oracle APEX Interactive Grid (IG) and include additional fields such as employee name, manager ID, hire date, and department number, follow these detailed steps:
const collectionName = "EMP_LINES_COLL";

function getViewLines() {
    // Initialize the structure for selected records
    let selRecords = { "rows": [] };

    // Get the interactive grid view and selected records
    let gridView = apex.region("ig_emp_id").widget().interactiveGrid("getViews").grid;
    let records = gridView.getSelectedRecords();

    // Check if there are selected records
    if (records.length > 0) {
        // Iterate through each selected record
        $.each(records, function (i, r) {
            // Get the record ID
            let empId = gridView.model.getRecordId(r);

            // Retrieve the field values
            let rowData = {
                "empid": empId,
                "ename": gridView.model.getValue(r, "ENAME"),      // Adjust column names as needed
                "mgr": gridView.model.getValue(r, "MGR"),
                "hiredate": gridView.model.getValue(r, "HIREDATE"),
                "deptno": gridView.model.getValue(r, "DEPTNO")
            };

            // Add the row data to the records array
            selRecords.rows.push(rowData);
        });

        // Convert selected records to JSON
        let selRecordsJSON = JSON.stringify(selRecords);

        // Call the server process
        apex.server.process("GET_LINES", {
            x01: records.length,
            x02: selRecordsJSON,
            x03: collectionName
        }, {
            dataType: 'JSON',
            success: function (data) {
                let errorCode = data.return_status;
                let errorMessage = data.return_message;
                let redirectUrl = data.redirect_url;

                // Handle the response from the server
                if (errorCode === 'S') {
                    console.log('Process completed successfully.');
                    if (redirectUrl) {
                        window.location.href = redirectUrl; // Redirect if URL is provided
                    }
                } else {
                    console.error('Error:', errorMessage);
                }
            },
            error: function (jqXHR, textStatus, errorThrown) {
                // Handle errors
                console.error("Error:", textStatus, errorThrown);
            }
        });
    } else {
        console.warn('No records selected.');
    }
}
Server-Side: PL/SQL for Multi-Column Data Processing
Use the following PL/SQL code to handle multi-column data in the Interactive Grid:
DECLARE
    l_return_status   CHAR(1) := 'S';
    l_return_message  VARCHAR2(4000);
    l_values          apex_json.t_values;
    l_row_count       NUMBER;
    l_emp_id          NUMBER;  -- Adjust the size as needed based on your data
    l_ename           VARCHAR2(100); -- Adjust size as needed
    l_mgr             NUMBER;  -- Adjust size as needed
    l_hiredate        DATE;    -- Adjust size as needed
    l_deptno          NUMBER;  -- Adjust size as needed
BEGIN
    -- Create or truncate the APEX collection
    apex_collection.create_or_truncate_collection(p_collection_name => apex_application.g_x03);

   IF apex_application.g_x01 > 0 THEN
        -- Parse the JSON data
        apex_json.parse(p_values => l_values, p_source => apex_application.g_x02);
        l_row_count := apex_json.get_count(p_path => 'rows', p_values => l_values);

        -- Loop through each row in the JSON data
        FOR i IN 1..l_row_count LOOP
            -- Get the values from JSON data
            l_emp_id := apex_json.get_number(p_path => 'rows[%d].empid', p0 => i, p_values => l_values);
            l_ename := apex_json.get_varchar2(p_path => 'rows[%d].ename', p0 => i, p_values => l_values);
            l_mgr := apex_json.get_number(p_path => 'rows[%d].mgr', p0 => i, p_values => l_values);
            l_hiredate := apex_json.get_varchar2(p_path => 'rows[%d].hiredate', p0 => i, p_values => l_values);
            l_deptno := apex_json.get_number(p_path => 'rows[%d].deptno', p0 => i, p_values => l_values);

            -- Add the record to the APEX collection
            apex_collection.add_member(
                p_collection_name => apex_application.g_x03,
                p_c001 => l_emp_id,   -- Emp ID
                p_c002 => l_ename,    -- Name
                p_c003 => l_mgr,      -- Manager
                p_c004 => l_hiredate, -- Hire Date
                p_c005 => l_deptno    -- Department Number
            );
        END LOOP;
   END IF;

    -- Write response JSON
    apex_json.open_object;
    apex_json.write('return_status', l_return_status);
    apex_json.write('return_message', l_return_message);
    apex_json.close_object;
EXCEPTION
    WHEN OTHERS THEN
        apex_json.open_object;
        apex_json.write('return_status', 'E');
        apex_json.write('return_message', 'Error occurred: ' || SQLERRM);
        apex_json.close_object;
END;
Key Points:
- JavaScript Enhancements: Fetches and formats multiple fields, including handling date formats.
- PL/SQL Adjustments: Processes multiple columns and correctly formats date values.
- Error Handling: Provides comprehensive error handling and status reporting.
Applications:
- Complex Data Handling: Supports scenarios where multiple data attributes need to be processed.
- Detailed Reporting: Enables detailed data extraction and reporting from Interactive Grids.
Conclusion
Integrating client-side JavaScript with Ajax callback PL/SQL in Oracle APEX not only streamlines data handling but also unlocks advanced capabilities for Interactive Grid management. This approach allows for dynamic and responsive interactions, ensuring that the application remains both powerful and user-friendly. Here’s a deeper look into the advantages and insights provided by these methods:
- Real-Time Interactions: Ajax callbacks enable immediate data processing without page reloads, leading to a smoother and more responsive user experience.
- Advanced Data Handling: Server-side PL/SQL can manage complex data structures and multiple columns, making it ideal for applications that need detailed data processing and reporting.
- Enhanced User Experience: Dynamic features like tooltips improve usability by offering contextual information directly within the grid, helping users make informed decisions.
- Optimized Performance: Efficiently managing user-selected data in bulk reduces server load and enhances application performance, especially for large datasets.
- Scalable and Maintainable: This approach supports scalable solutions by cleanly separating client-side and server-side logic, facilitating easier updates and maintenance.
By implementing these strategies, Oracle APEX applications can achieve robust data handling and an intuitive user interface, boosting both functionality and user satisfaction. Stay tuned to our blog for more Oracle APEX insights and best practices.
Happy developing!