- Introduction
In this blog, we will learn how to create and manage workflows in Oracle APEX in a simple and step-by-step way. Whether you are a beginner or already working with APEX, this guide will help you understand how workflows can improve efficiency, ensure consistency, and streamline your application processes.
2. What is this Workflow?
Workflow Definitions define how a process flows in the system.
They include steps (activities), users (participants), and rules (conditions), and are available in Shared Components of the application.
This system allows users to:
- Request stock changes (Increase or Decrease)
- Send requests for approval
- Track status like Pending, Approved, or Rejected.
Each request includes:
- Medicine name.
- Quantity.
- Request type (IN or OUT).
When approved:
- IN → Stock increases.
- OUT → Stock decreases.
Everything is recorded with user details and timestamps for tracking.
3. A Complete Step-by-Step Guide to Workflow Implementation in Oracle APEX.
3.1. Create Table
First, we create a database table (for example: PHARMACY_STOCK_REQUEST) to store all request details. This table can be used for different types of workflows such as dispatch requests, stock adjustments, or product approval requests.
For example, when a user raises a dispatch request for a product, the request is stored in this table and then sent through a workflow for approval. Similarly, if there is a need for stock adjustment (increase/decrease in quantity), the request can be created and processed through defined workflow steps like approval and status updates.
This table stores all important data like:
- Item name.
- Quantity.
- Status.
- Request type.
This is the base of our workflow.
3.2. Create Form with Report
Next, we build a Form with Report page in Oracle APEX.
- The form is used to enter new requests.
- The report shows all existing requests.
- The form opens as a modal dialog for better user experience.
3.3. Create Task
Now we move to:
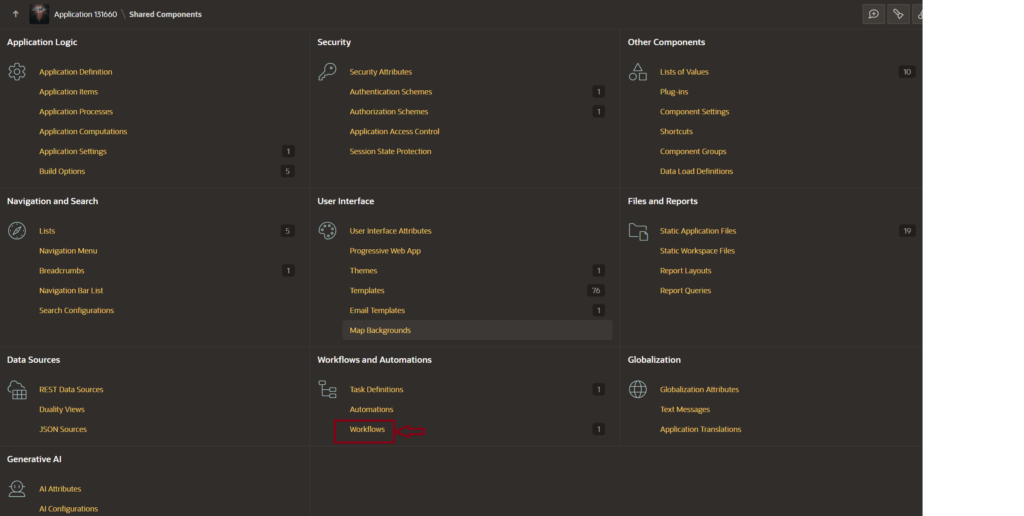
Shared Components → Workflows and Automations → Task Definitions
Here we:
- Create a new task.
- Set Manager as Potential Owner.
- Set Storekeeper as Business Admin.
- Add required parameters.
- Link the form page.
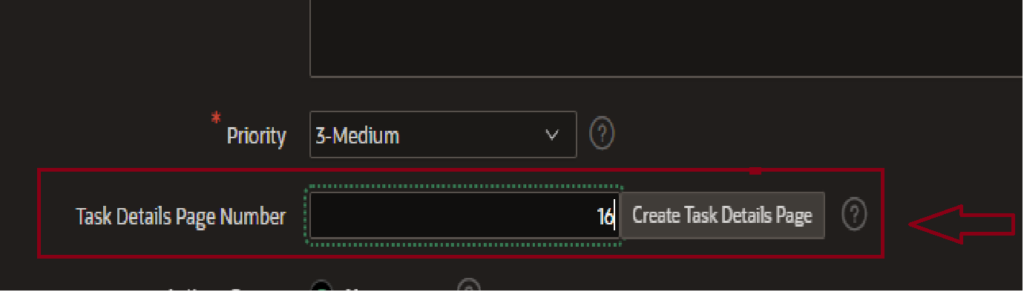
Oracle APEX automatically generates a Task Details Page.
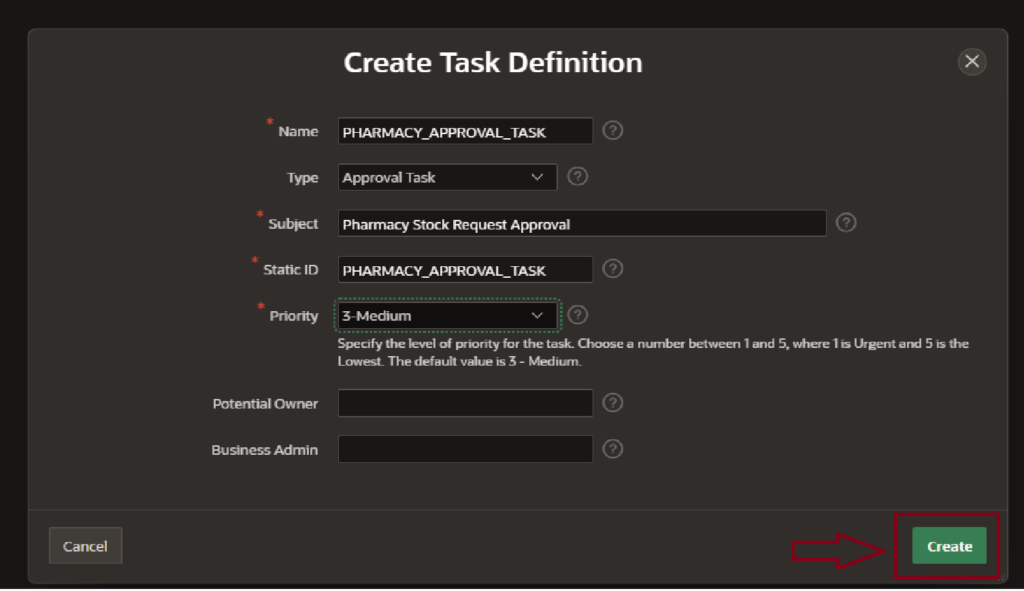
The task has been successfully created, and the Static ID is automatically generated by Oracle APEX.
After configuring the task, we entered all required details. The Potential Owner was set as the Manager, while the Business Administrator was assigned as the Storekeeper. Required parameters were then passed, and the appropriate form page was specified.
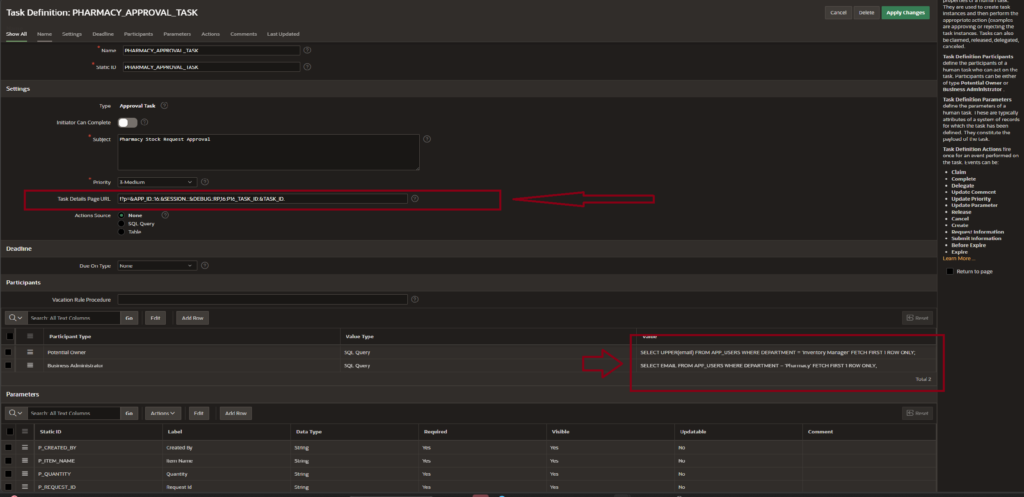
and the by entering the page number and clicking on ‘Create Task Details Page’, Oracle APEX automatically generates the task details URL.
3.4. Create Workflow
Now we create the main workflow: Shared Components → Workflows
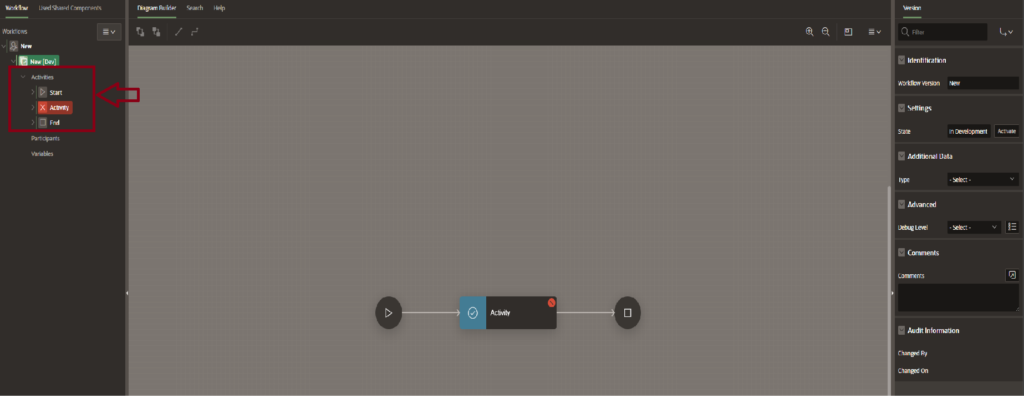
The workflow includes:
- Start.
- Activity.
- End.
We add:
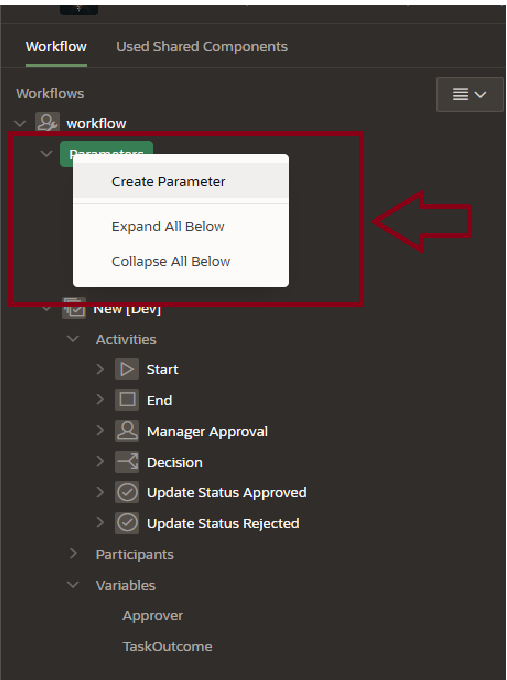
To proceed, navigate to the Parameters section and create the necessary parameters required for the workflow.
When you create the Manager Approval activity, you need to select the type as ‘Human Task – Create.
Human Task (Manager Approval)
Required fields like Task ID, Owner, and Outcome.
Then:
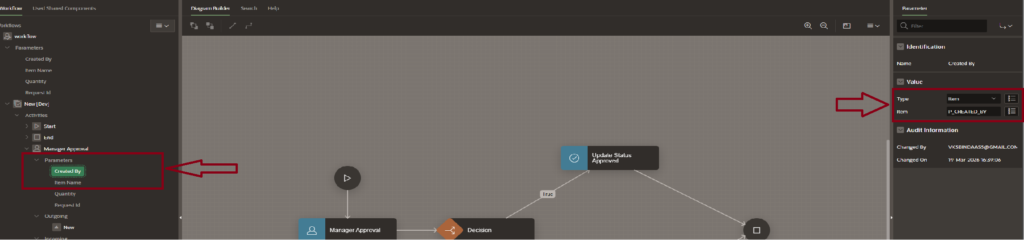
- Map parameters (change type to Item).
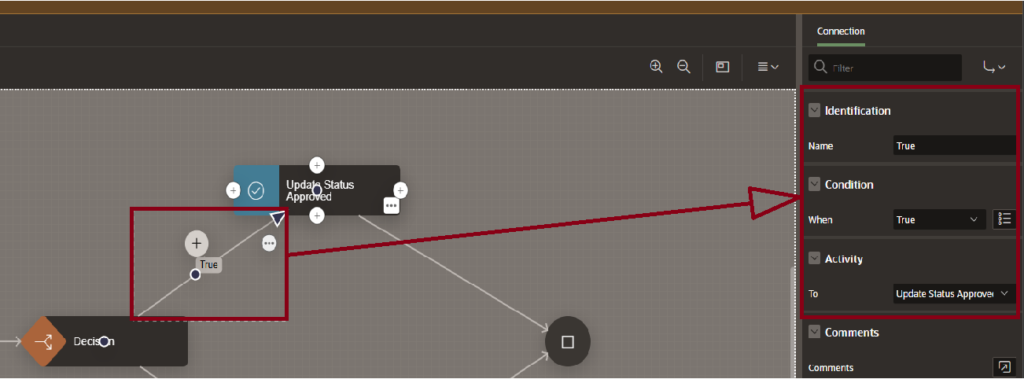
- Use Switch (Decision) for approval/rejection.
Example logic:
- TRUE → Approved.
- FALSE → Rejected.
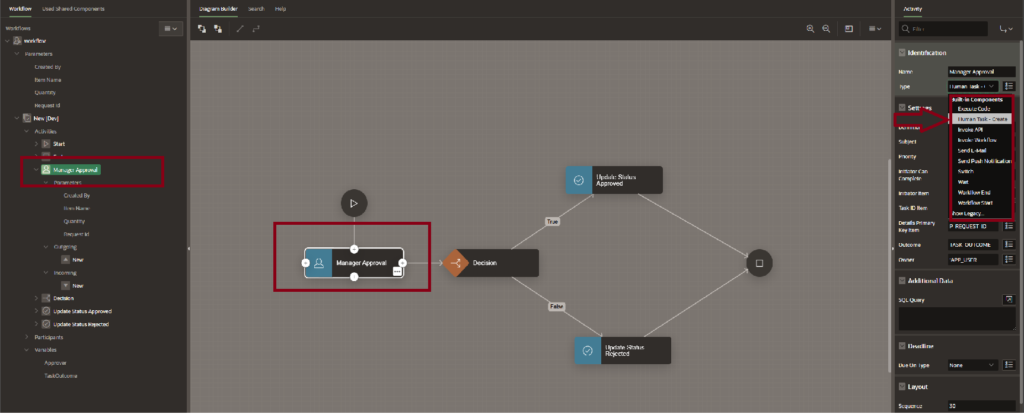
After that, you must fill in the required fields such as Task ID, Details Primary Key, Outcome, and Owner.
Next, go to the Parameters section. By default, the values will be null. You need to change the type to ‘Item’ and then map it with the parameters you have already created by selecting the corresponding items.
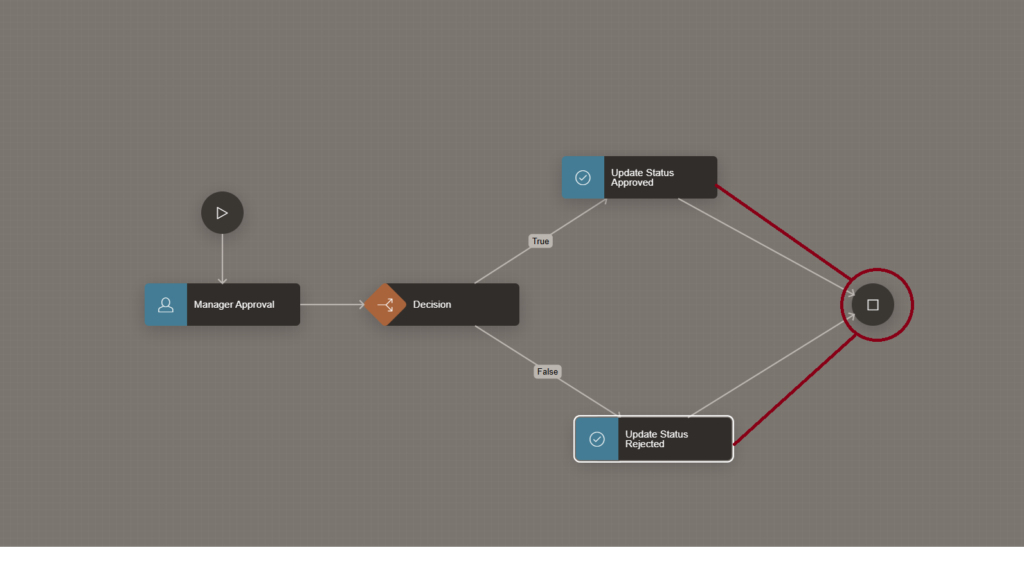
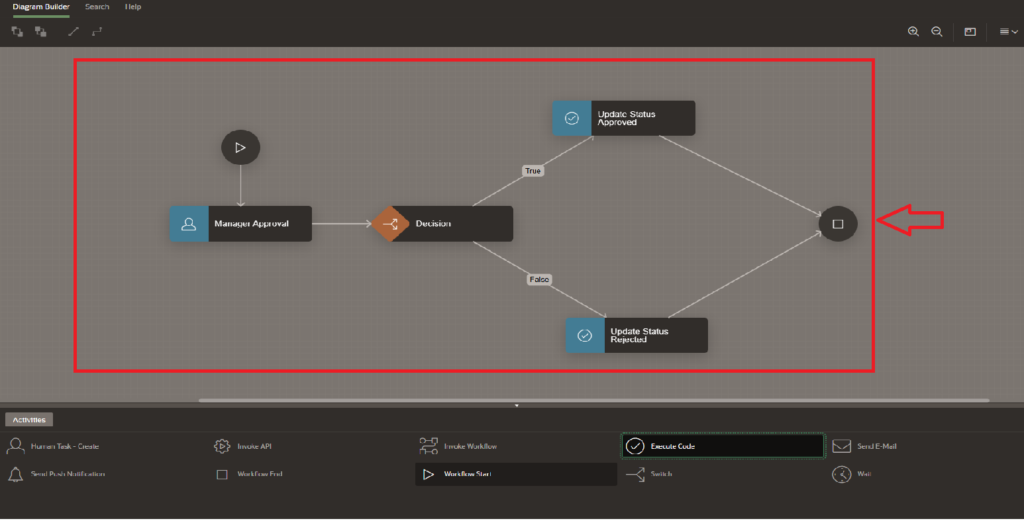
you can select the activities from the bottom panel and place them in the workflow diagram. For decision-making, you can use the Switch (Decision) component.

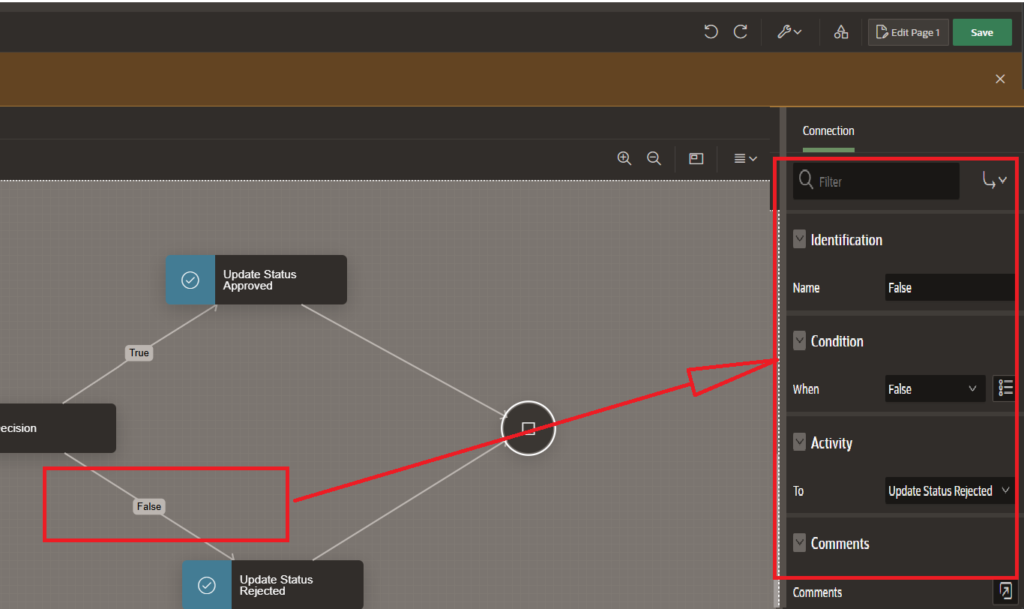
Using the Execute Code option, you can define conditions such as True and False. For example, if the condition is True, the request will be approved, and if it is False, the request will be rejected.
Finally, connect both outcomes to the End node to complete the workflow.
After this, you need to write the Execute Code for Update Status (Approved) and Update Status (Rejected).
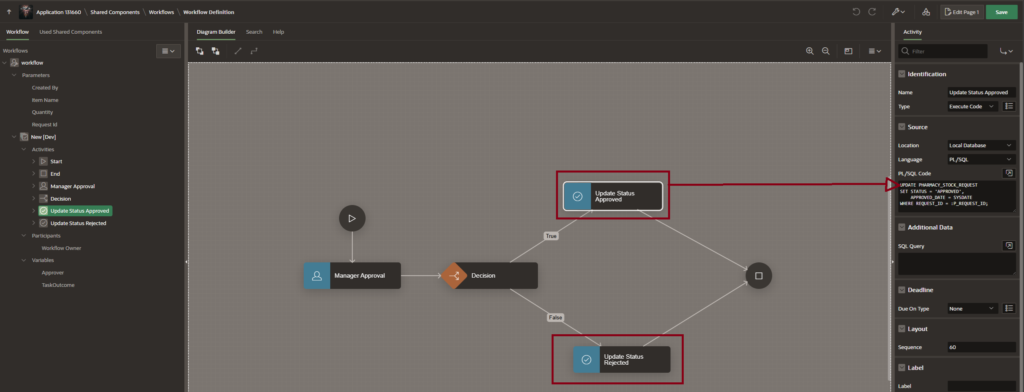
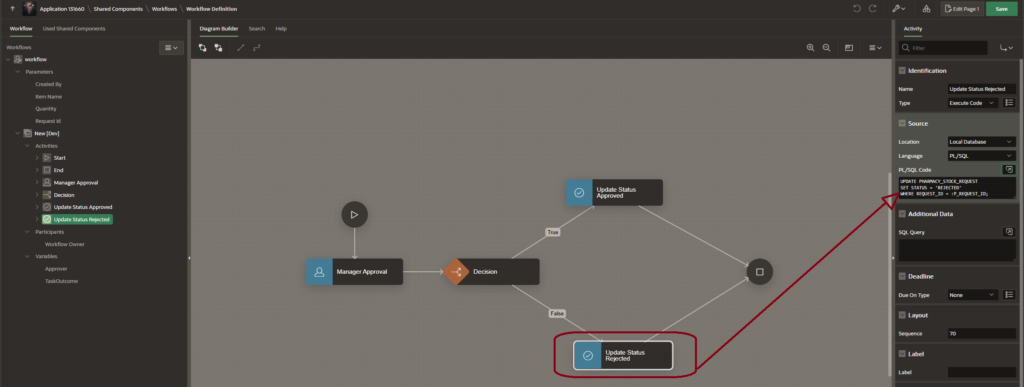
The workflow is now successfully completed. Finally, connect everything to the End node.
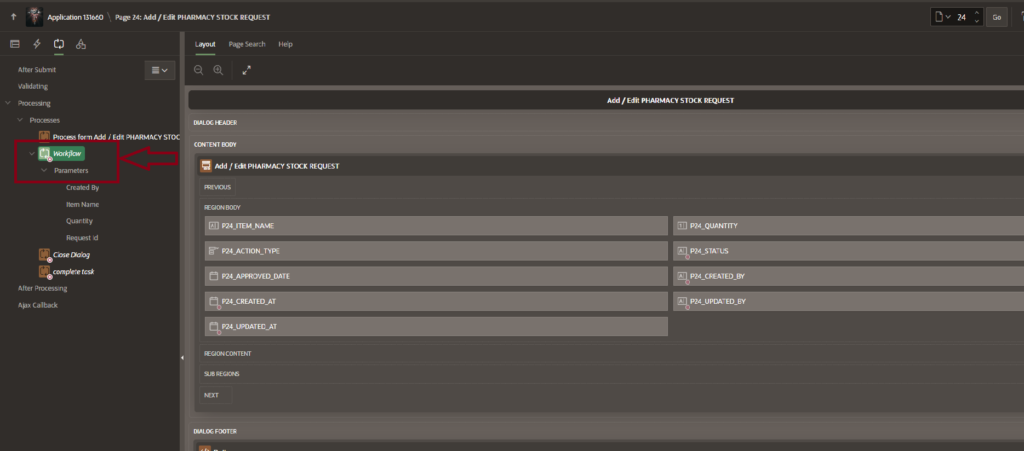
3.5 Connect Workflow with Form
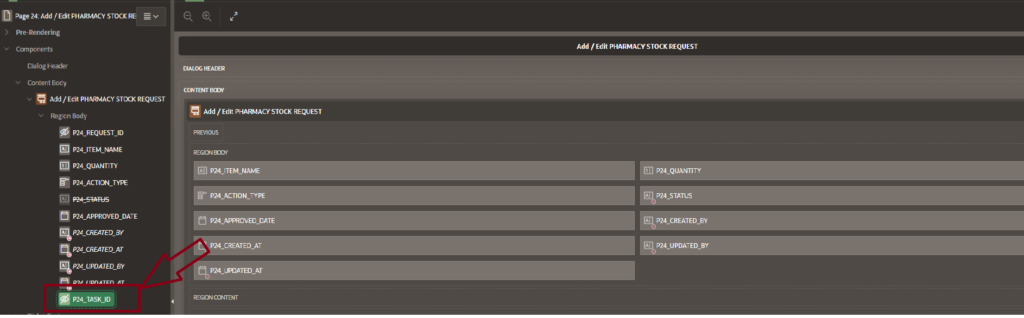
Now we integrate workflow with the form page:
- Create a hidden item → Task ID.
- Create process → Type: Workflow.
- Map all parameters.
- Create another process → Complete Task.
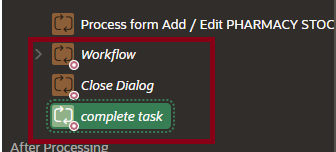
Important Order:
- Workflow.
- Close Dialog.
- Complete Task.
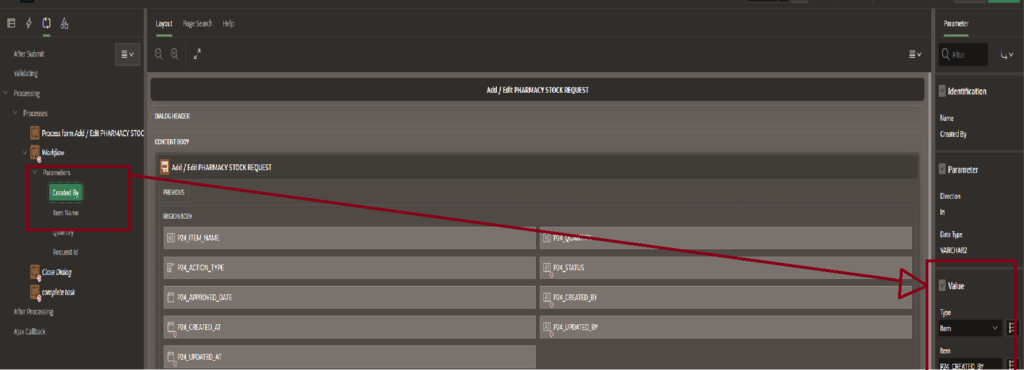
Next, create a process and select the type as ‘Workflow’. Then, map all the parameters by setting their type to ‘Item’ and selecting the corresponding page items, as they are null by default.
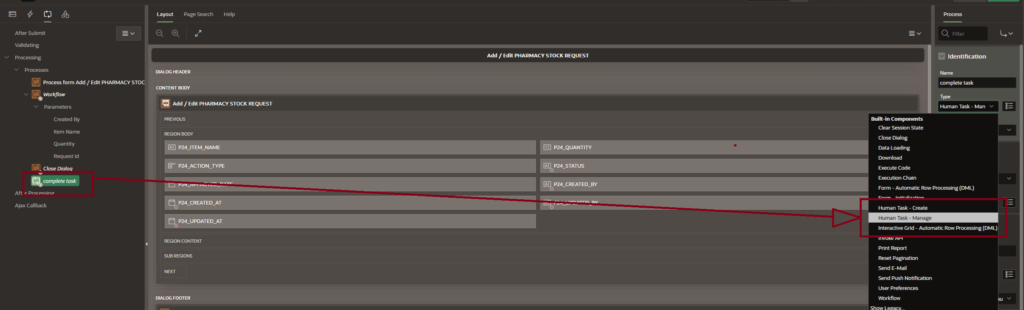
After that, create another process named ‘Complete Task’ and set its type to ‘Human Task – Manage’. In this process, select the Task ID item.
The most important point is to maintain the correct sequence of processes:
first Workflow, then Close Dialog, and finally Complete Task.
Using the Create Page option, you need to create both the Unified Task List and Workflow Console pages. First, we will create the Unified Task List page.
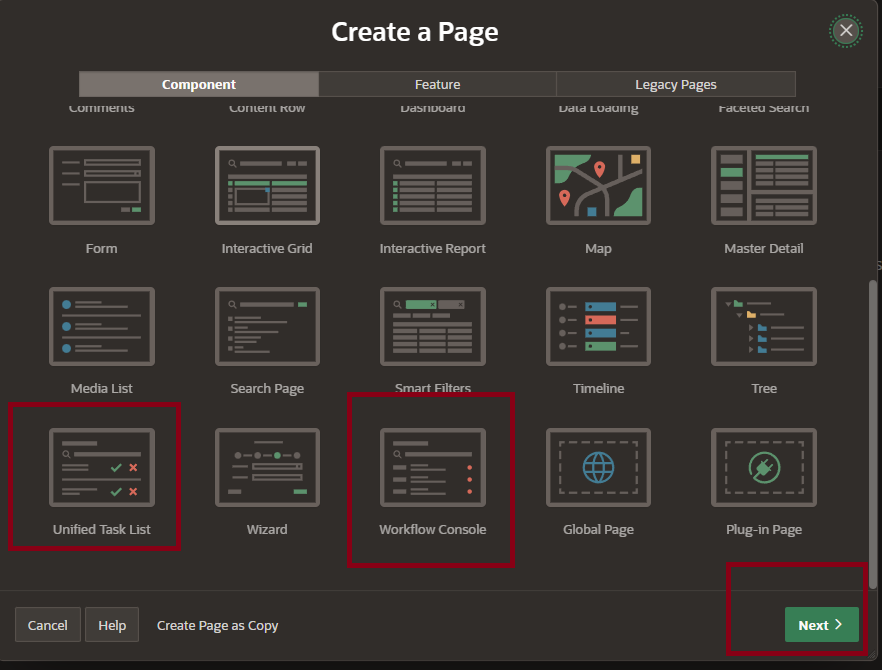
Using the Create Page option, you need to create both the Unified Task List and Workflow Console pages. First, we will create the Unified Task List page.
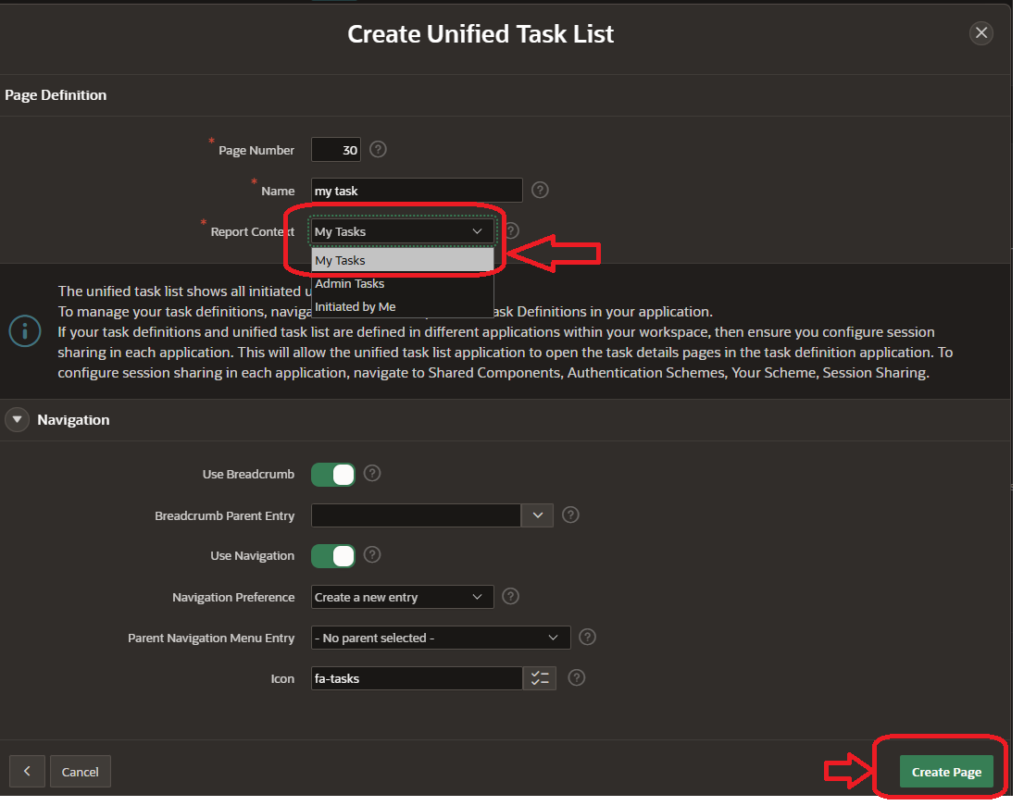
A form will open where you need to select ‘My Task’ in the Report Context, and then click on Create Page.
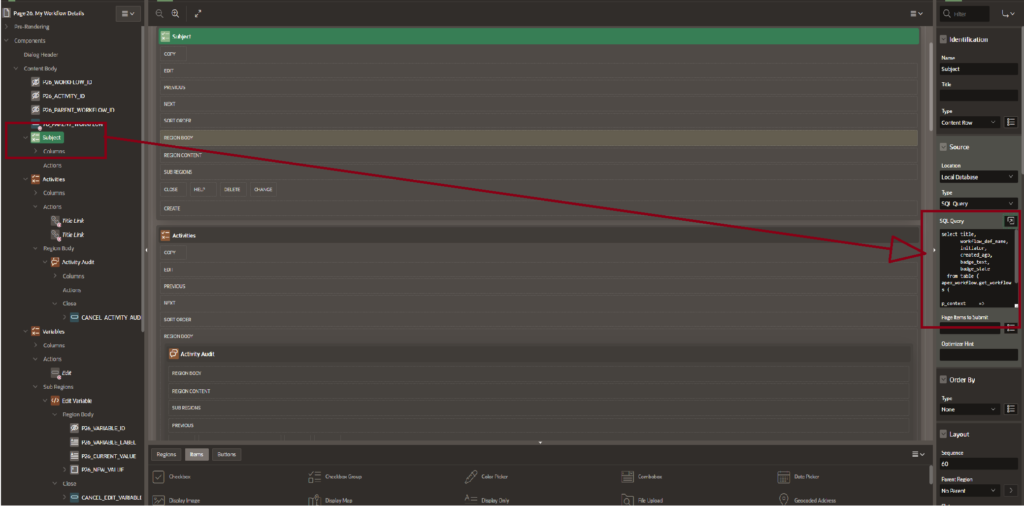
After creating the form, you will see some code that is commented out by default. You need to uncomment that code.
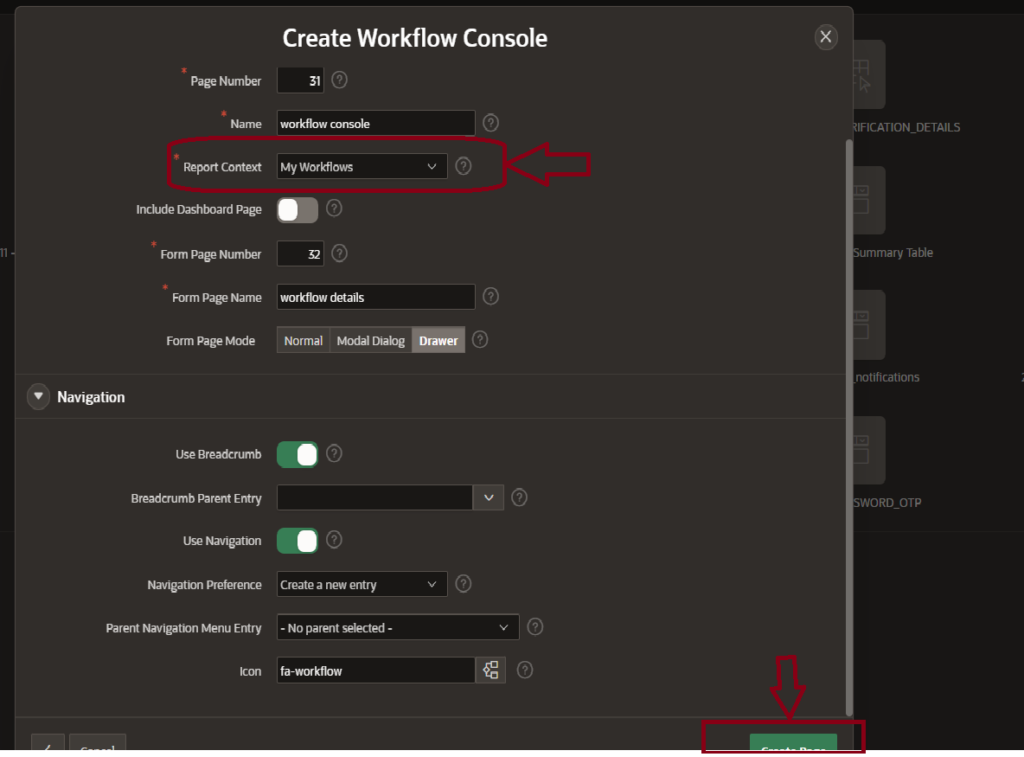
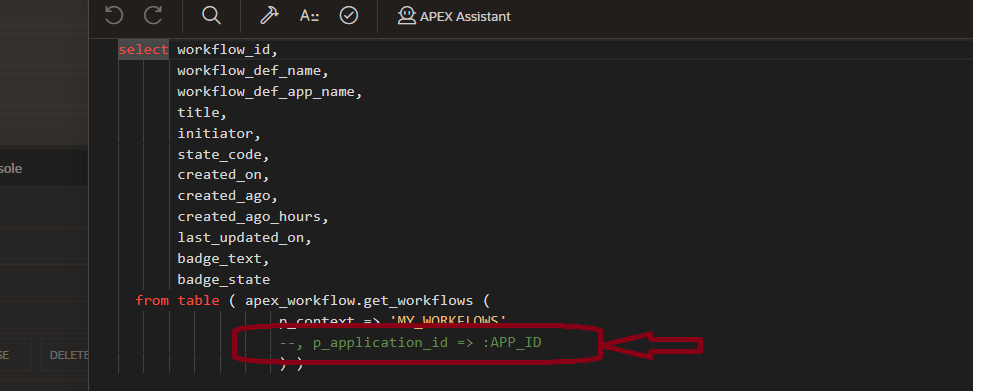
Similarly, you need to create the Workflow Console page and also uncomment the default SQL code to make it functional.
Here, you will see that it is automatically commented out code. You need to uncomment it.
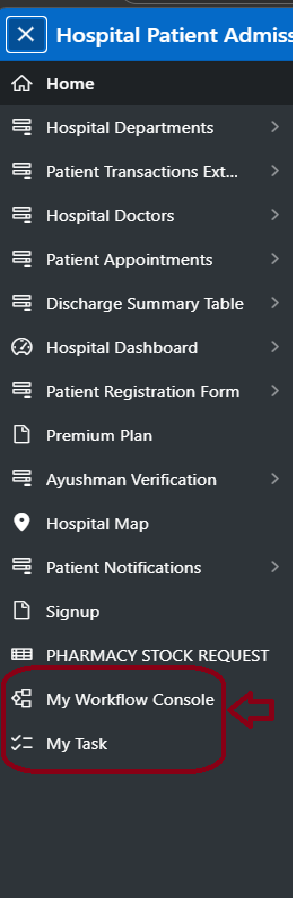
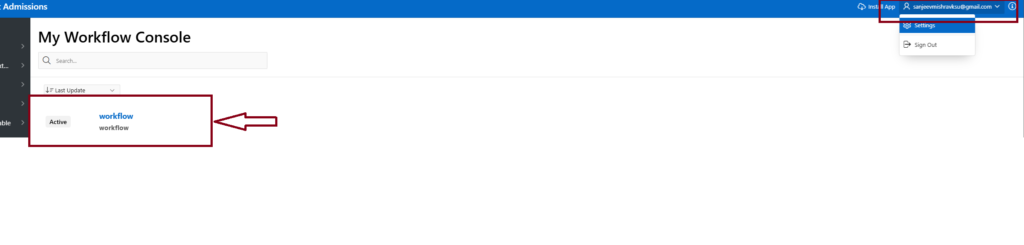
After that, the Workflow Console and Task pages will be visible in the navigation menu.
The workflow and task configuration is now complete. Next, we will test the implementation to ensure everything is working correctly.
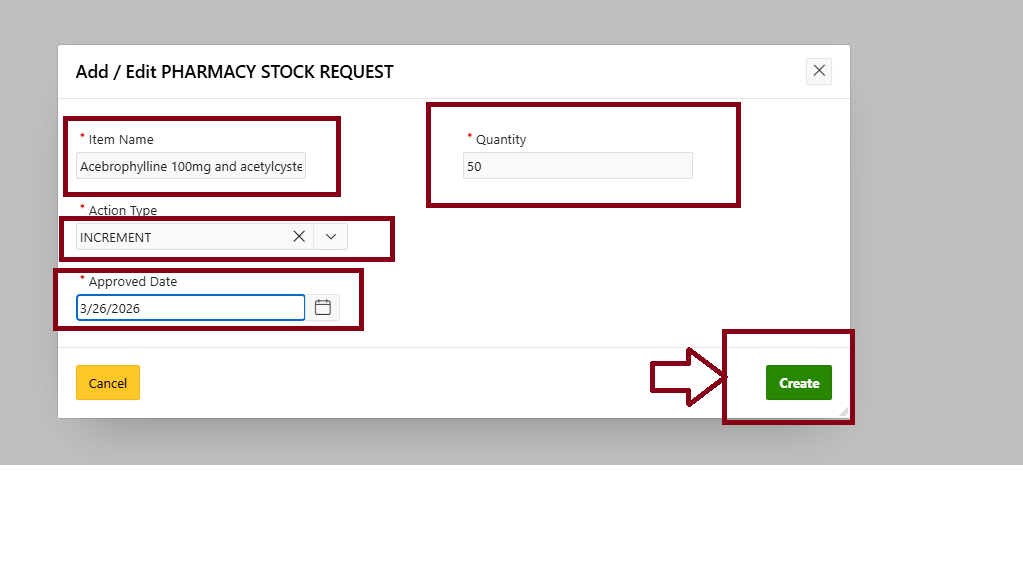
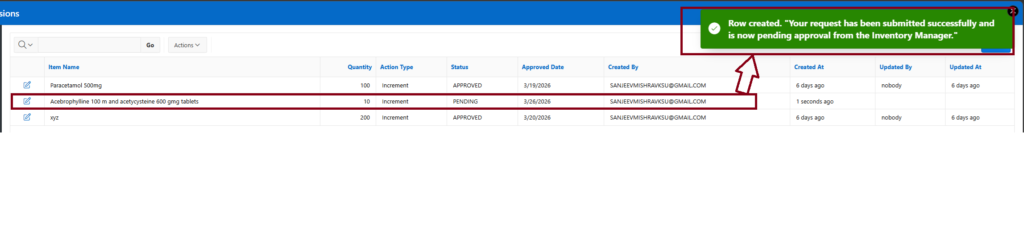
The workflow has been successfully and sent for approval. The current status of the request is displayed as ‘Pending.
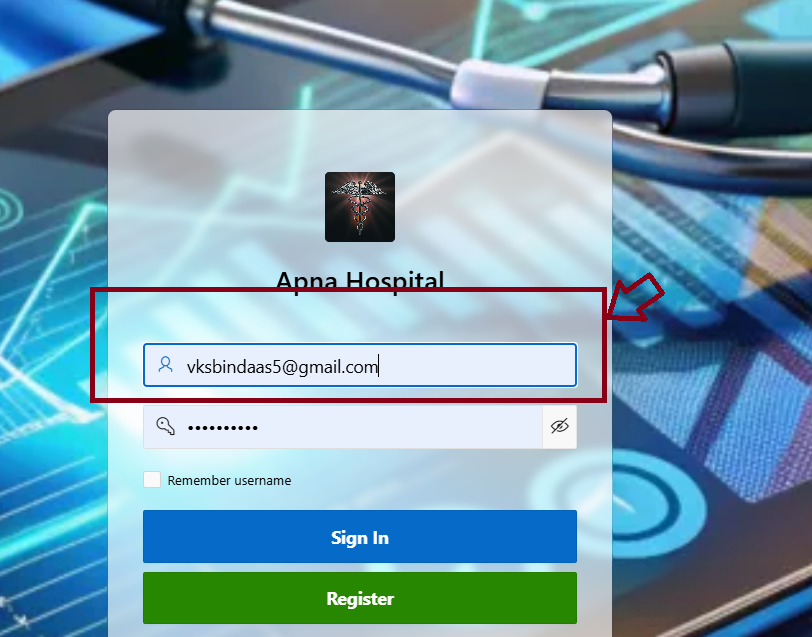
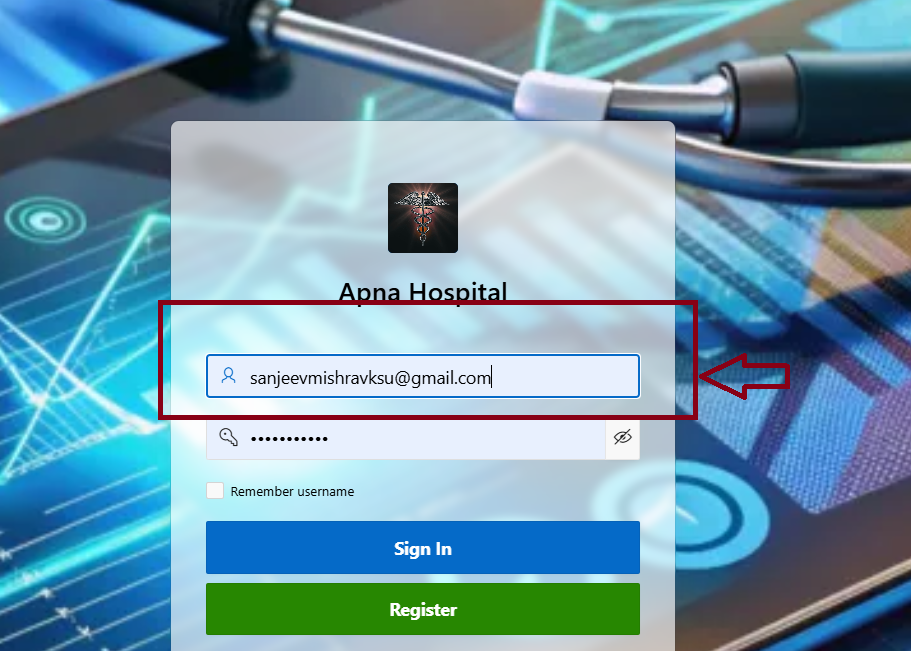
The workflow has now reached the approval stage. At this point, we were logged in as the Storekeeper. Next, we logged in using the Inventory Manager’s credentials to take action on the task.

After logging in as the Inventory Manager, we received the task notification. We then approved the request (this step depends on the user, as the task can be either approved or rejected). A confirmation message for task approval was displayed.
Finally, we logged in again using the Pharmacy user account and verified that the request status has been automatically updated to ‘Approve’.

After rejecting the task, the workflow followed the rejection path. The request status has been automatically updated to ‘Rejected’, confirming that the rejection flow is working correctly.
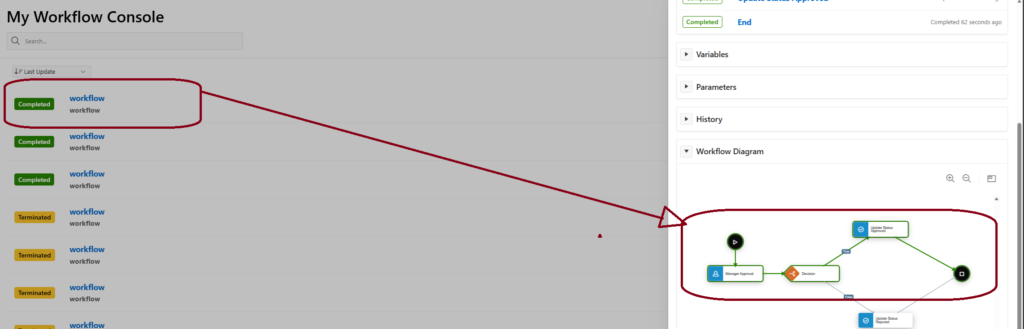

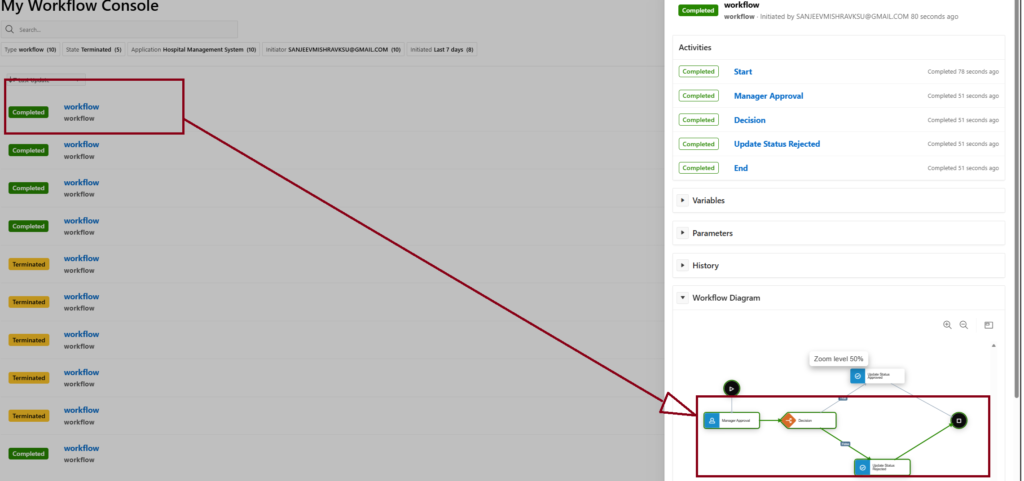
Final Conclusion:
This confirms that both approval and rejection workflows are functioning correctly, and the system is properly updating the request status based on user actions.